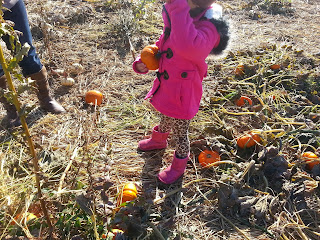
Pumpkin Exploration!!!
Pumpkin Circumference
Estimate the circumference of the pumpkin. The students guessed the number of cubes they thought it would take to go around their pumpkins. The students placed the cubes around their pumpkins and counted the cubes to check their estimations.
Pumpkin Heights
We estimated the height of the pumpkins. The students guessed the number of cubes they will need to match the height of their pumpkins. The students measured the height of their pumpkins with cubes and counted the cubes to check their estimations.
Pumpkin Seeds
The students removed the pumpkin seeds from the pumpkin and grouped the pumpkin seeds in sets of ten. We introduced skip counting by 10's to the students. We counted the seeds by tens. We counted 140 seeds!!! Sure glad that we cut open a small pumpkin:)
The students described how the inside of the pumpkin looked, smelled, felt and sounded. Many of the students did not enjoy the smell of the pumpkin nor the way the pumpkin felt. The descriptive words used were as follows: wet, slimy, slippery.

 Pumpkins Float! Question: Do pumpkins float or sink in water?
Answer: 2 of the students predicted their pumpkins would float and 6 of the students predicted that their pumpkins would sink.
One at a time, the students placed their pumpkins in a bucket of water and discovered that pumpkins float.
Conclusion: All pumpkins, big and small, float!
Graphing pumpkins!
Devise a graph on the colors of the pumpkins in class.
Which color group has the most pumpkins?
Which color group has the least number of pumpkins?
Candy corn and pumpkin sorting game. Ready, Set, GO!!!
Candy Corn and Pumpkin Patterns
Create AB, ABB, ABC or ABCD patterns.
We made Pumpkin Play dough!
Ingredients: 2 cups of flour, 2 cups of warm water, 2 Tbsp. oil, 2 Tbsp cream of Tarter, 1 cup salt, yellow food coloring, red food coloring, cinnamon and mulling spice or pumpkin pie spice.
Mix the flour, cream of tarter and salt. Add the warm water and oil, stir continuously. To make the play dough orange, add a few drops of yellow and red food coloring (use less red). Sprinkle in cinnamon and mulling spice and stir. Microwave on high for 45 seconds. Remove from microwave and stir well. Repeat this process until the play dough is thick enough to form a ball. Knead the play dough for a few minutes. Enjoy! We wanted to make sensory play dough as well, so we added autumn sprinkles to the dough as we were kneading it.
The class may not realize how much they were learning because they were having so much fun!
Math Skills: counting, sequencing- 1st, 2nd, 3rd, measuring, sorting and colors.
Science: experimenting, sensory exploration, observing how the mixture changed after it was cooked.
Art: creating
Fine Motor Skills: pouring, mixing, stirring, kneading, rolling
Social Skills: sharing and working together
P is for Puzzle.
Not all the students wanted to solve a puzzle saying "I can't do it!" But, Guess what?? They all did it and smiled with pride!
Skills Practiced: eye-hand coordination, fine motor practice, problem solving, memory skills and seeing patterns, similarities and differences.
P is for Pumpkin. We finished painting pumpkins!
During this time we practiced cooperation and sharing, fine motor skills, eye-hand coordination and color mixing. The class did a FANTASTIC job using the words please and thank you.
During circle time, we set a goal to create a list of words beginning with the letter P. Then during snack we wrote a list of P words on the white board. When the list was complete, we counted the words, 17 words!!! Then, the students searched, found and pointed to the p's on the board.
This activity promotes sequential memory, visual discrimination, form constancy, visual memory and figure ground.
Soft Pumpkin Play Dough Recipe
Ingredients:
4 cups of flour
1 cup of oil
red and yellow food coloring
Cinnamon
Mulling Spice or pumpkin pie spice
Thoroughly mix the flour and the oil. To make orange play dough, Add a few drops of yellow and red food coloring (less red). Add cinnamon and mulling spice to make the play dough smell like YUMMY Pumpkin Pie! Knead the dough to mix all the ingredients.
The class, excitedly, ran to the tables when I asked "Who wants to make play dough?" Some were jumping up and down awaiting a turn to get their hands on the bag of flour. As I carefully distributed oil, food coloring and spices, the eyes of disbelief was priceless!
Each student measured and poured 1 cup of flour and added 1/4 cup of oil. Then, they took turns mixing, kneading and adding food coloring and spices.
 |
| Kneading The Dough! |
 |
| Kneading the dough, ALL TOGETHER!!!! |
Penquin P's
The students were hard at work; tracing, manipulating scissors, identifying shapes, drawing and counting shapes, and pasting. We created Penquin P's!
Each student traced the letter P. Today was the first experience for the 3 year olds to trace a letter or object at FFCA. I wish I had my camcorder on to record when they removed the letter P and discovered their work... their excitment was priceless!!
 |
| Luke's P! |
 |
| Deacon's P |
 |
| Deacon is tracing a circle! Awesome work Deacon!!! |
Puzzles
Solving puzzles was challenging for some of the students. However, their determination would NOT distract them from the task. This mission required teamwork. It was delightful to hear a child ask a classmate the following question: "Will you please help me?"

Pumpkin Painting
This activity assists in developing the following skills: learning to share, cooperation, practicing manners, color exploration, excercising fine motor control and practicing eye-hand coordination.
Practicing P
Finger paint P's, rainbow P's, dot art P's, finally, writing P's. It's a joy to watch the student's handwriting progress and it's priceless to listen to a student say "I did it!!"
Directions: finger paint the letter P's using your pointer finger. Start the letter at the top, big line down, frog jump up, curve around. Trace the remainder of the letter Pp's using your pencil.
Directions: Use the dot art bottle to make dots in the circles forming the letter P. Start at the top, big line down, frog jump up and curve around.
Directions: Choose 6 markers to trace the P. Start at the top, big line down, frog jump up and curve around.
Directions: Finger paint the letter P using your pointer finger, big line down, frog jump up and curve around.
 |
| Some of the kiddos do NOT like to touch the paint :) |
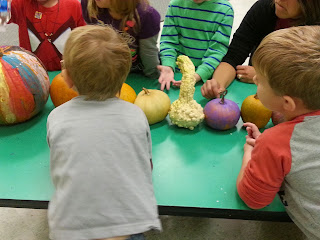
Pumpkin Exploration!
Question: How are the pumpkins different?
Answers: Pumpkins are smooth and bumpy.
The pumpkins are different colors.
Pumpkins have long stems, short stems and some do not have stems. Some pumpkins have curvy stems.
Pumpkins are small, medium and large.
The pumpkins have different shapes.
Some Pumpkins have spots, some pumpkins are more than 1 color.
Some of the pumpkins are painted.
Instruction: Line up the pumpkins from biggest to smallest.
Question: How many orange pumpkins do we have?
How many white pumpkins do we have?
How many green pumpkins do we have?
How many painted pumpkins do we have?
How many lines are on your pumpkin?
We estimated the number of inches around each pumpkin, then, measured each pumpkin. Some of the student's estimations were correct!!
Each student created a picture of their pumpkin.


